Weekend hacking: wireless charging for a HP-25 calculator
Or, bringing a 45-year old calculator into the 21st century.
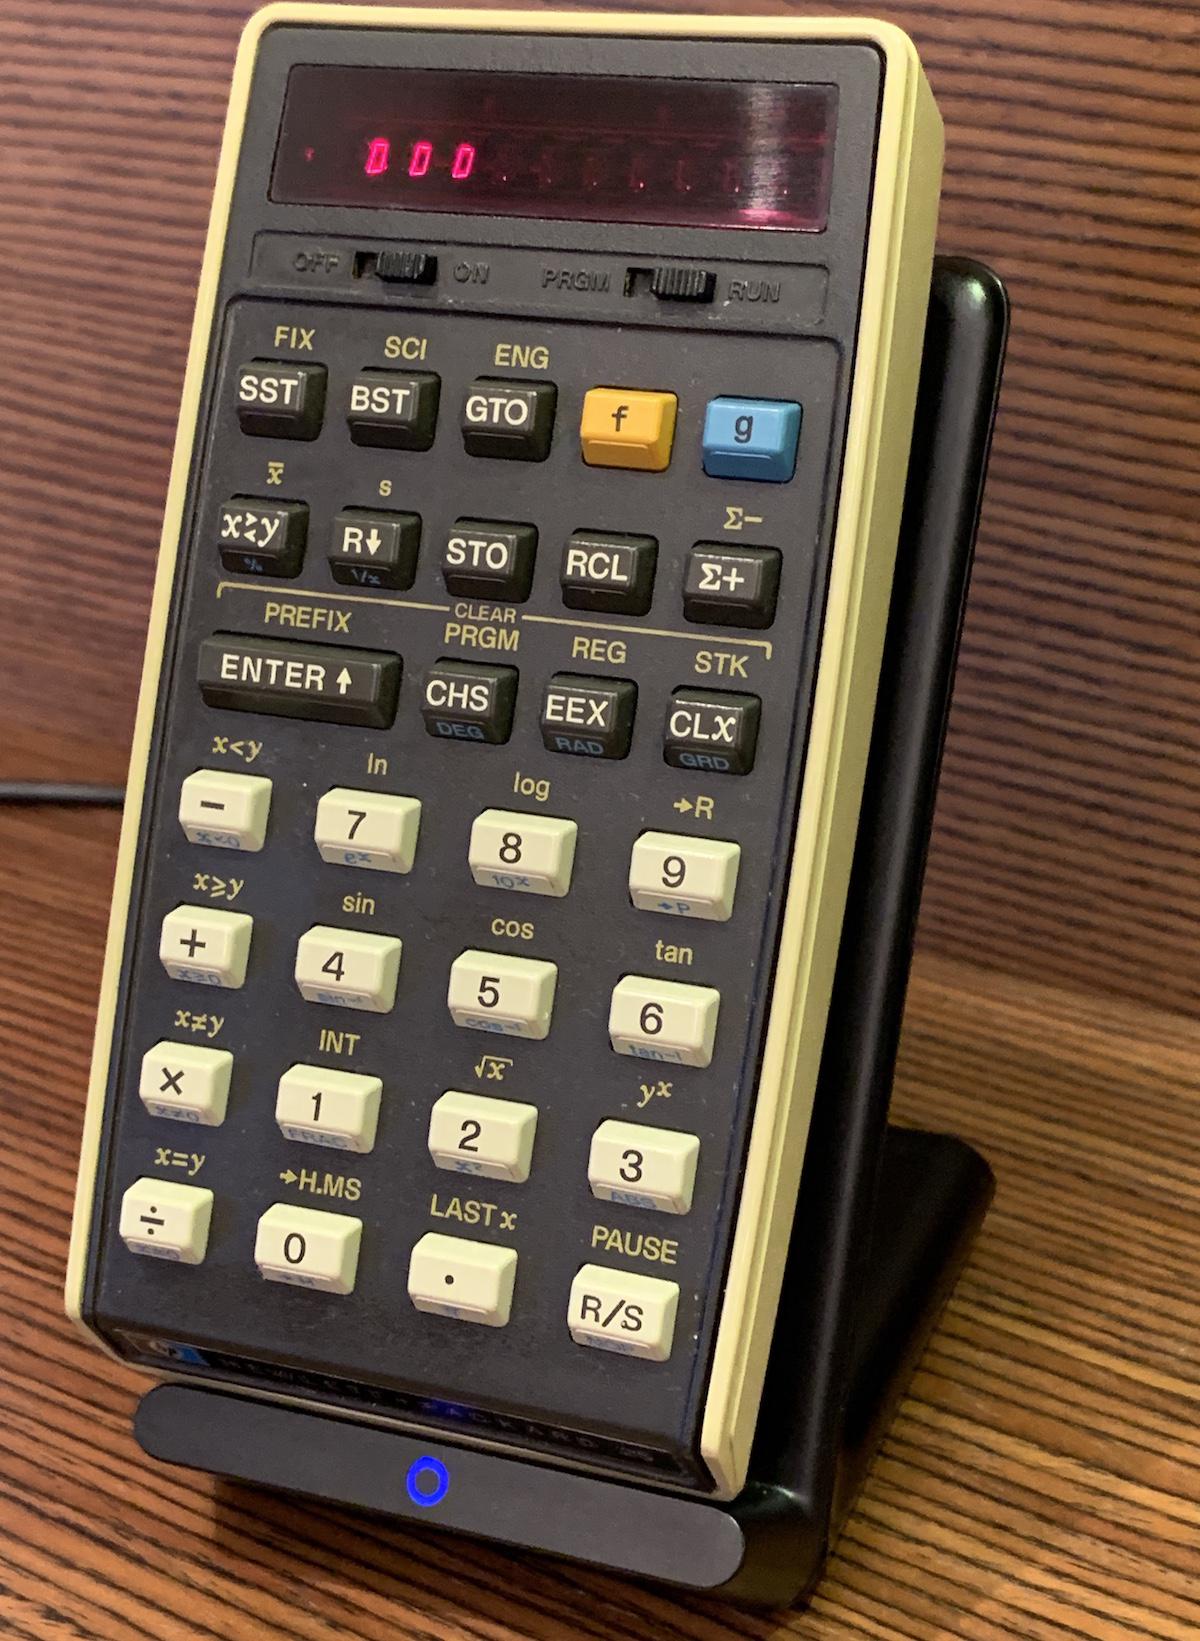
The HP-25 was a revolutionary calculator for its time. Introduced in 1975, it was the first affordable programmable engineering calculator. As years passed, more advanced models were developed with more functionality. But the 25 struck a particularly good balance between features, size, and ease of use.
Today we live in a very different world: we all have multiple powerful computing devices. No engineer would even consider doing graphing on a calculator today: we have computers that can do this faster and better. Similarly for algebraic manipulations or symbolic computing. What we still need, however, is a good engineering calculator — an easily accessible device that can perform simple calculations quickly and that has just the right number of functions.
This is why the HP-25 is becoming attractive again. If you work with electronics or mechanical design, you often need to work with scientific or engineering notation and perform calculations for which the simple calculator apps on your phone are too limited. The simple keystroke-based programmability means that you can quickly automate tasks: for example, I often have the parallel resistance formula entered as a program, accessible using a single keystroke. Enter two resistances, press R/S and get the result. The HP-25 was designed by engineers, for engineers, and you feel it when you use it. Importantly, it fits well into your palm and can be used with a single hand, which isn't true for many otherwise excellent later HP calculators (like the Voyager series: HP-11C and HP-15C).
The HP-25 I have was bought by my Dad, around the time I was born. I always enjoyed using it, but this whole series of calculators (dubbed "Woodstock") was limited by battery pack design. The original battery pack contained two sealed NiCd cells, which obviously failed many years ago. Most people replaced their NiCd cells with new ones, then with NiMh cells, or even alkaline AA batteries. This was always problematic: newer batteries were slightly larger and never fit well. Also, the power consumption of a calculator with an LED display was significant, so frequent battery replacements were needed.
The HP-25 was shipped with a "charger" (really just a transformer), but the charging circuit was terrible: the charger without load supplied 10V AC: a higher voltage than the calculator could handle, with the assumption that connected NiCd battery cells would clamp the voltage. The entire charging circuit consisted of a diode and a resistor! If your cells were not making proper contact, or if you connected a charger without the battery pack inserted, your calculator would be toast.
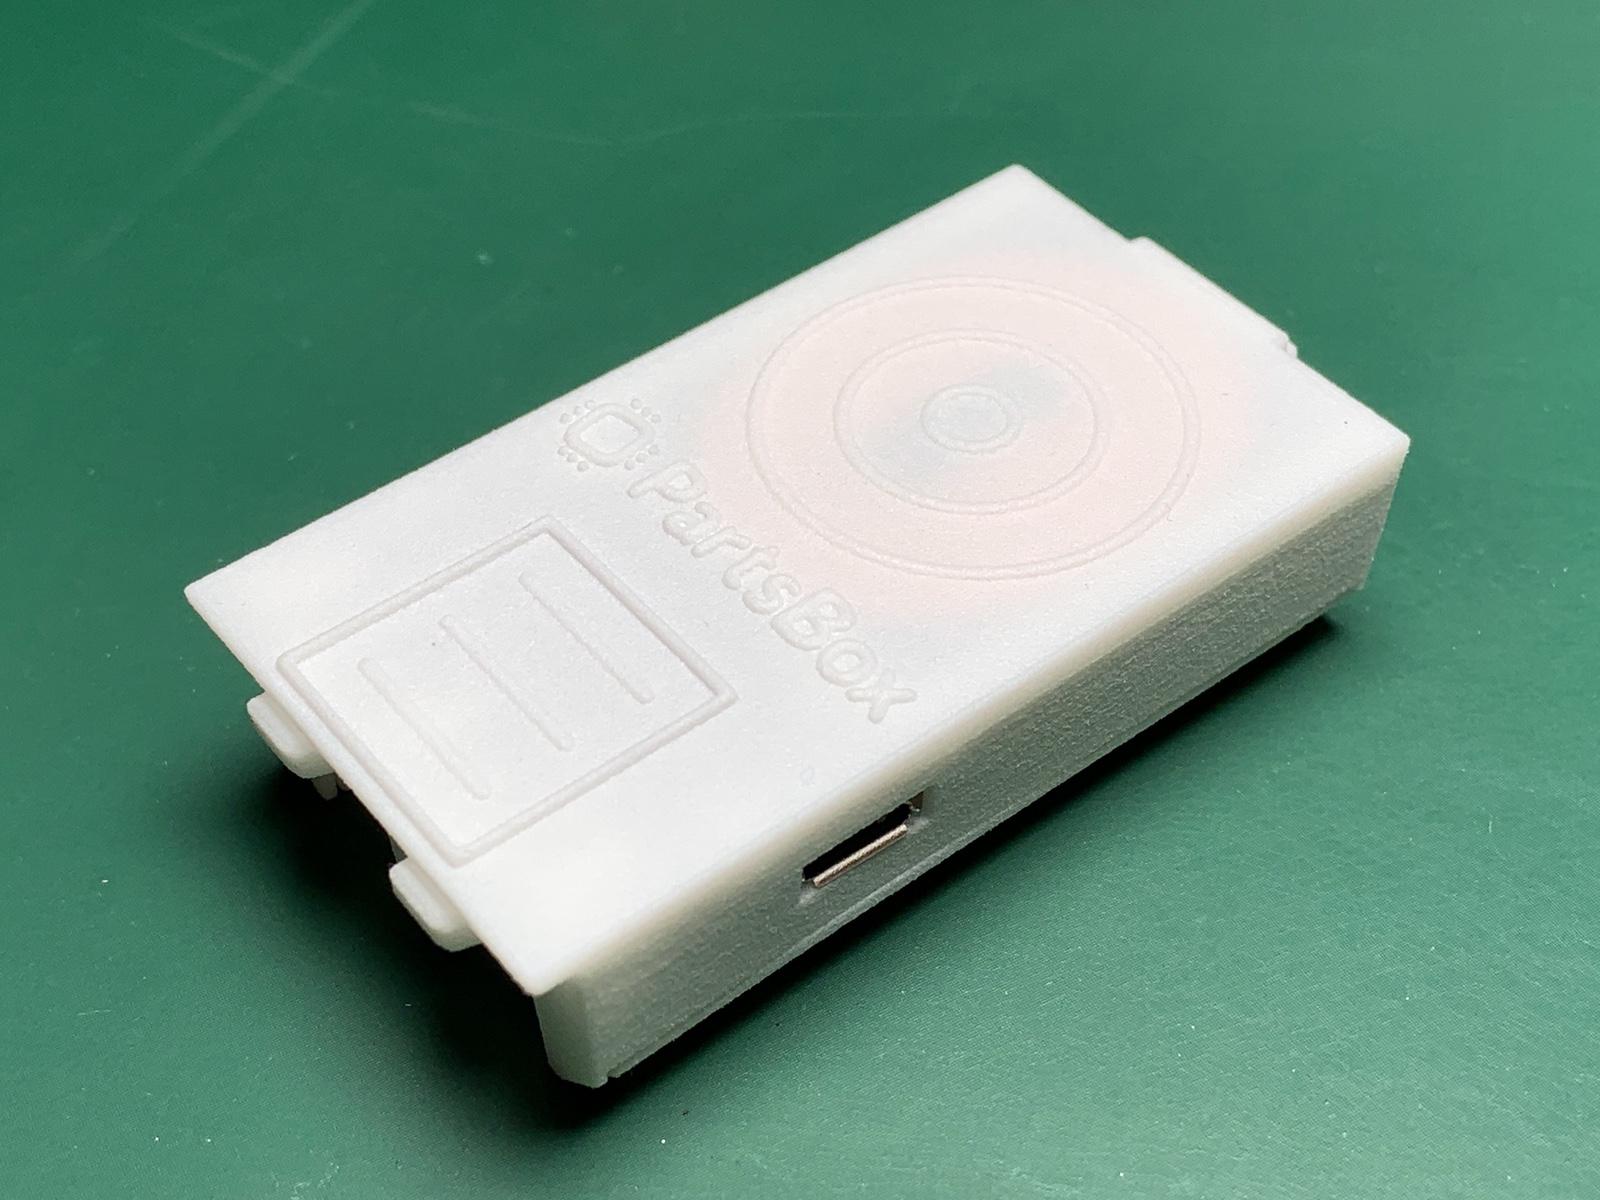
I decided I should do something to make my HP-25 usable every day. So, I set out to design a rechargeable battery pack, which replaces the original one, but uses a modern Li-Po battery, and has Qi/WPC wireless charging with a USB fallback.
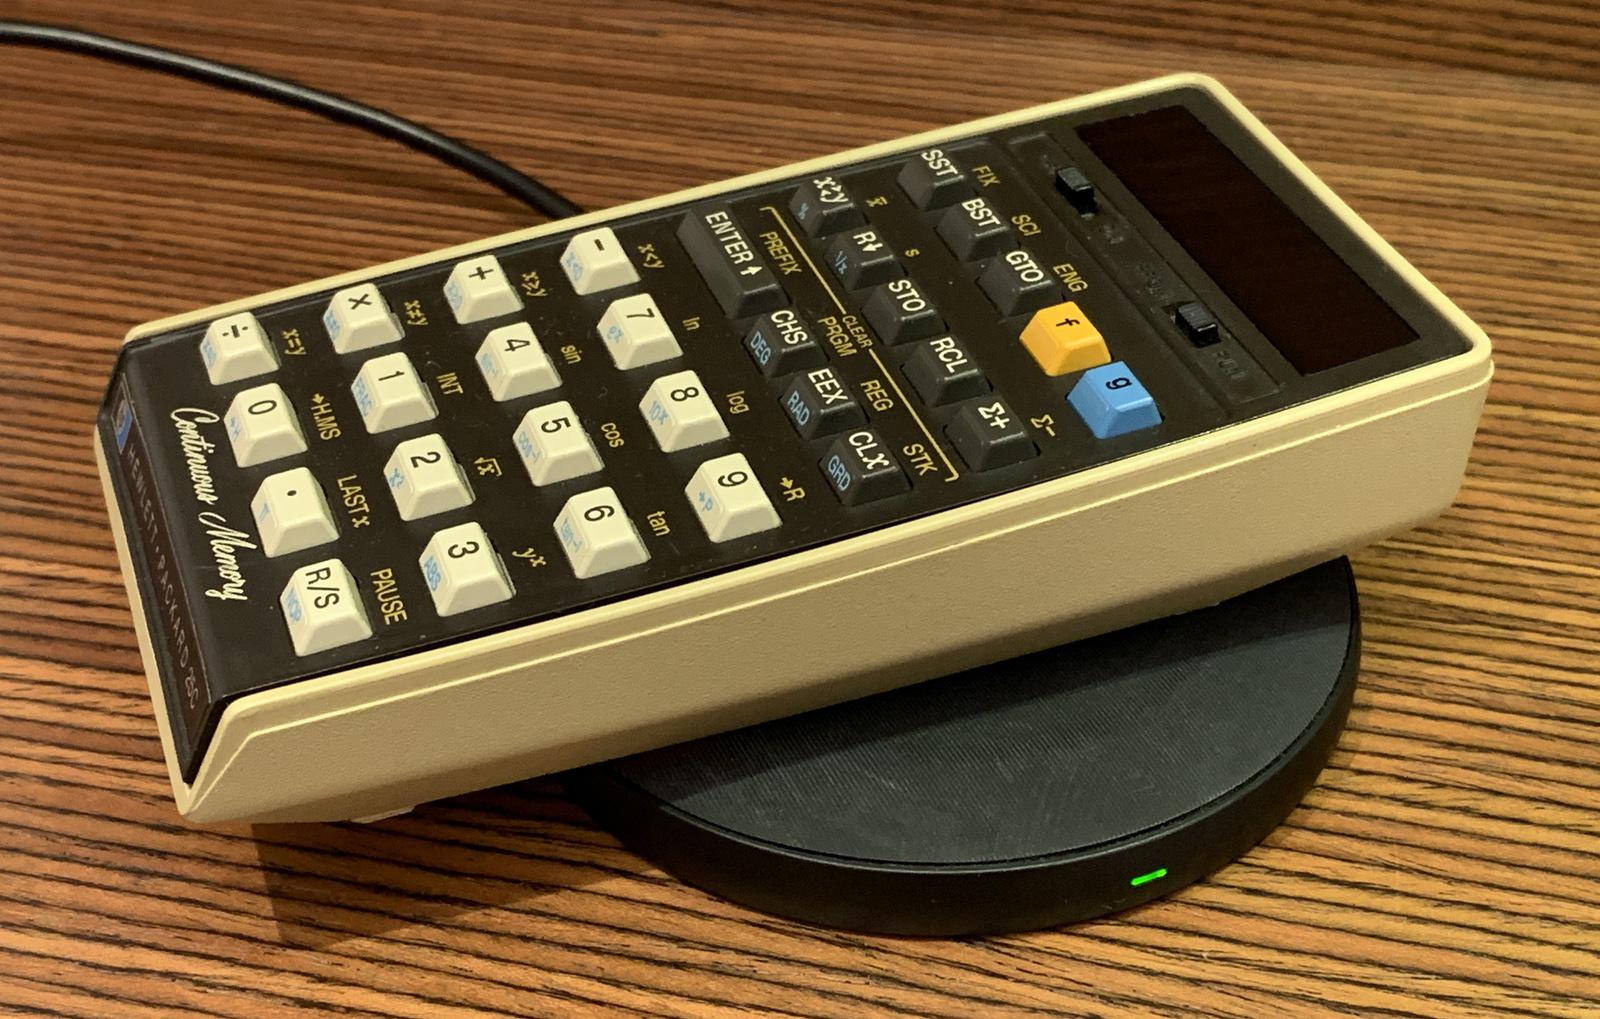
I now have the perfect engineering calculator, that is 45 years old and yet sits happily on a Qi power pad and recharges. If I don't have a pad available, I can remove the battery pack and use the micro-USB connector in the side to charge it. But as it turned out, charging isn't actually needed that often — a 900mAh LiPo provides enough energy for many weeks with my usage.
The design assumptions were:
- Should replace the original battery pack
- No modifications to the calculator itself
- WPC/Qi wireless charging
- Micro-USB connector for wired charging
- Li-Po battery lasting for at least multiple days of normal use
- Low-battery indicator
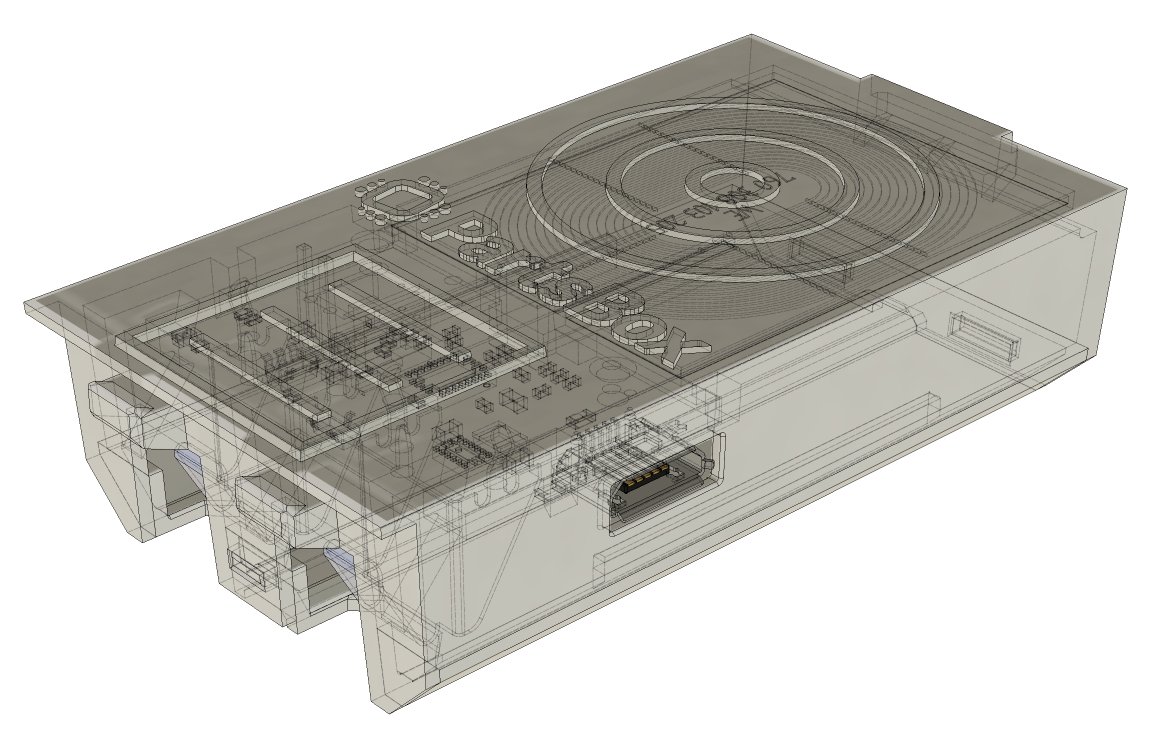
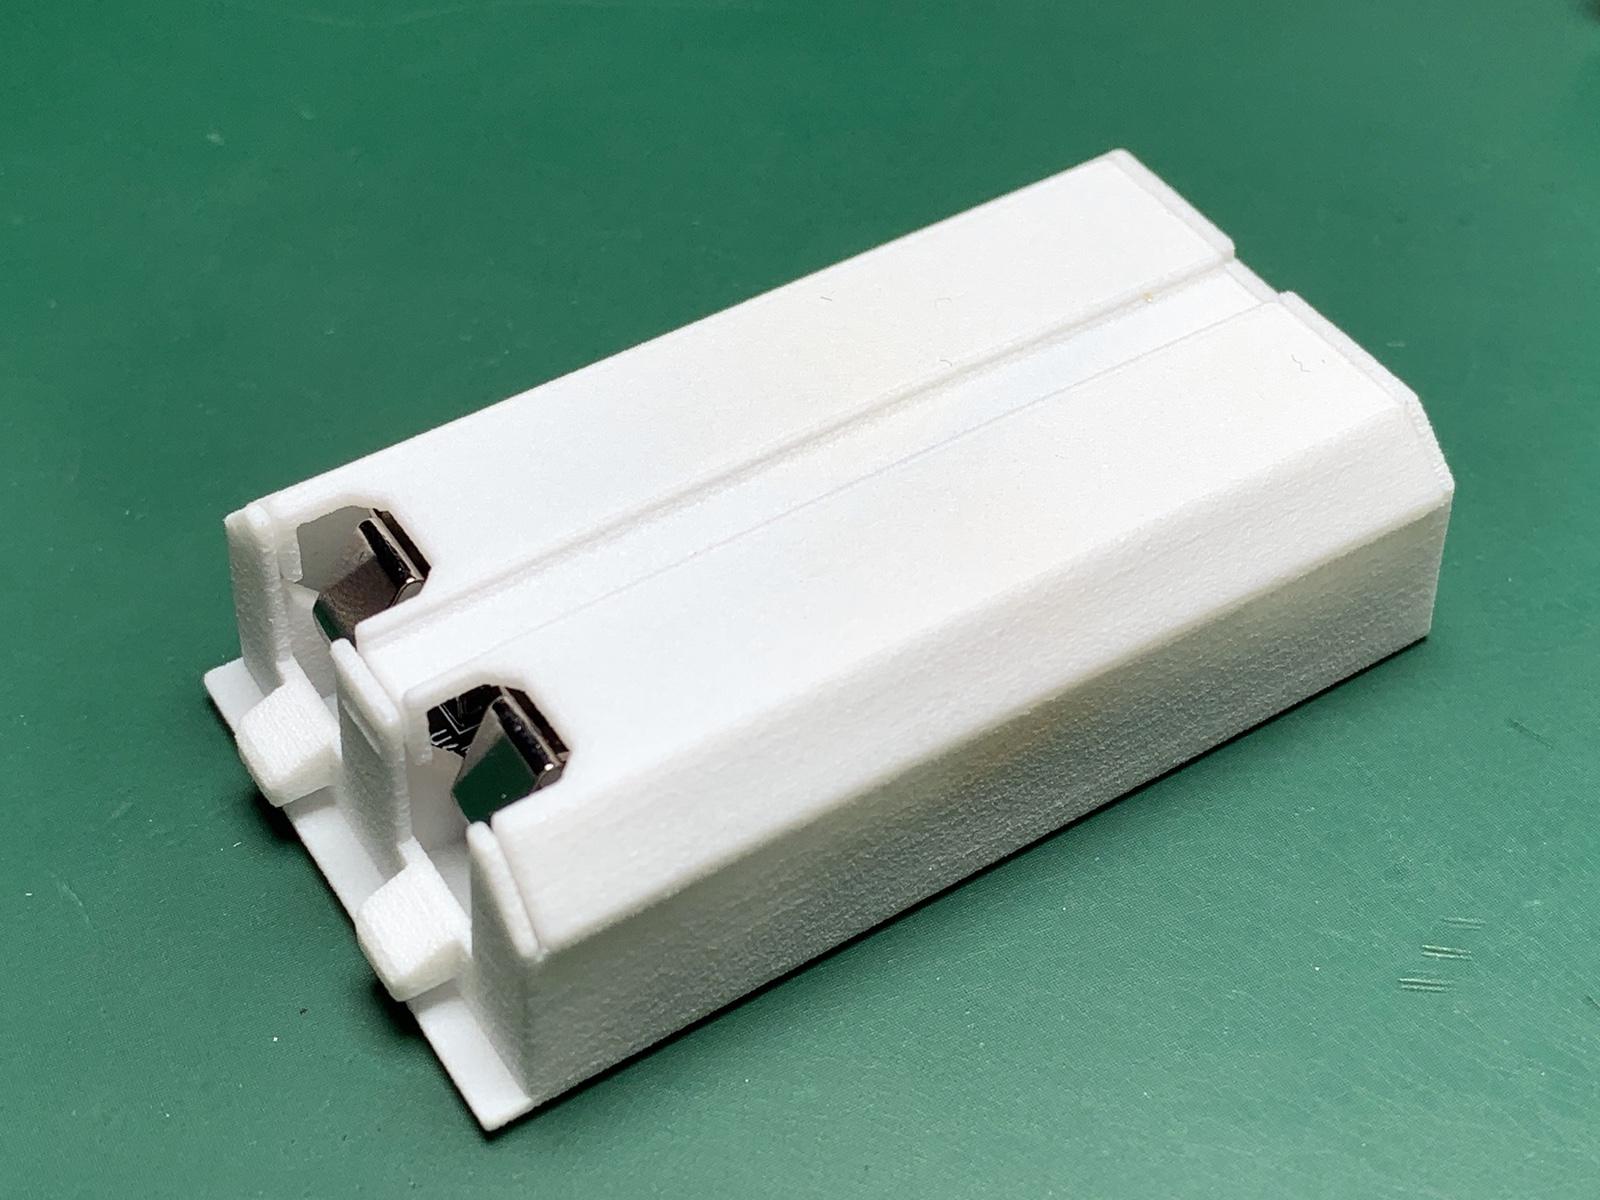
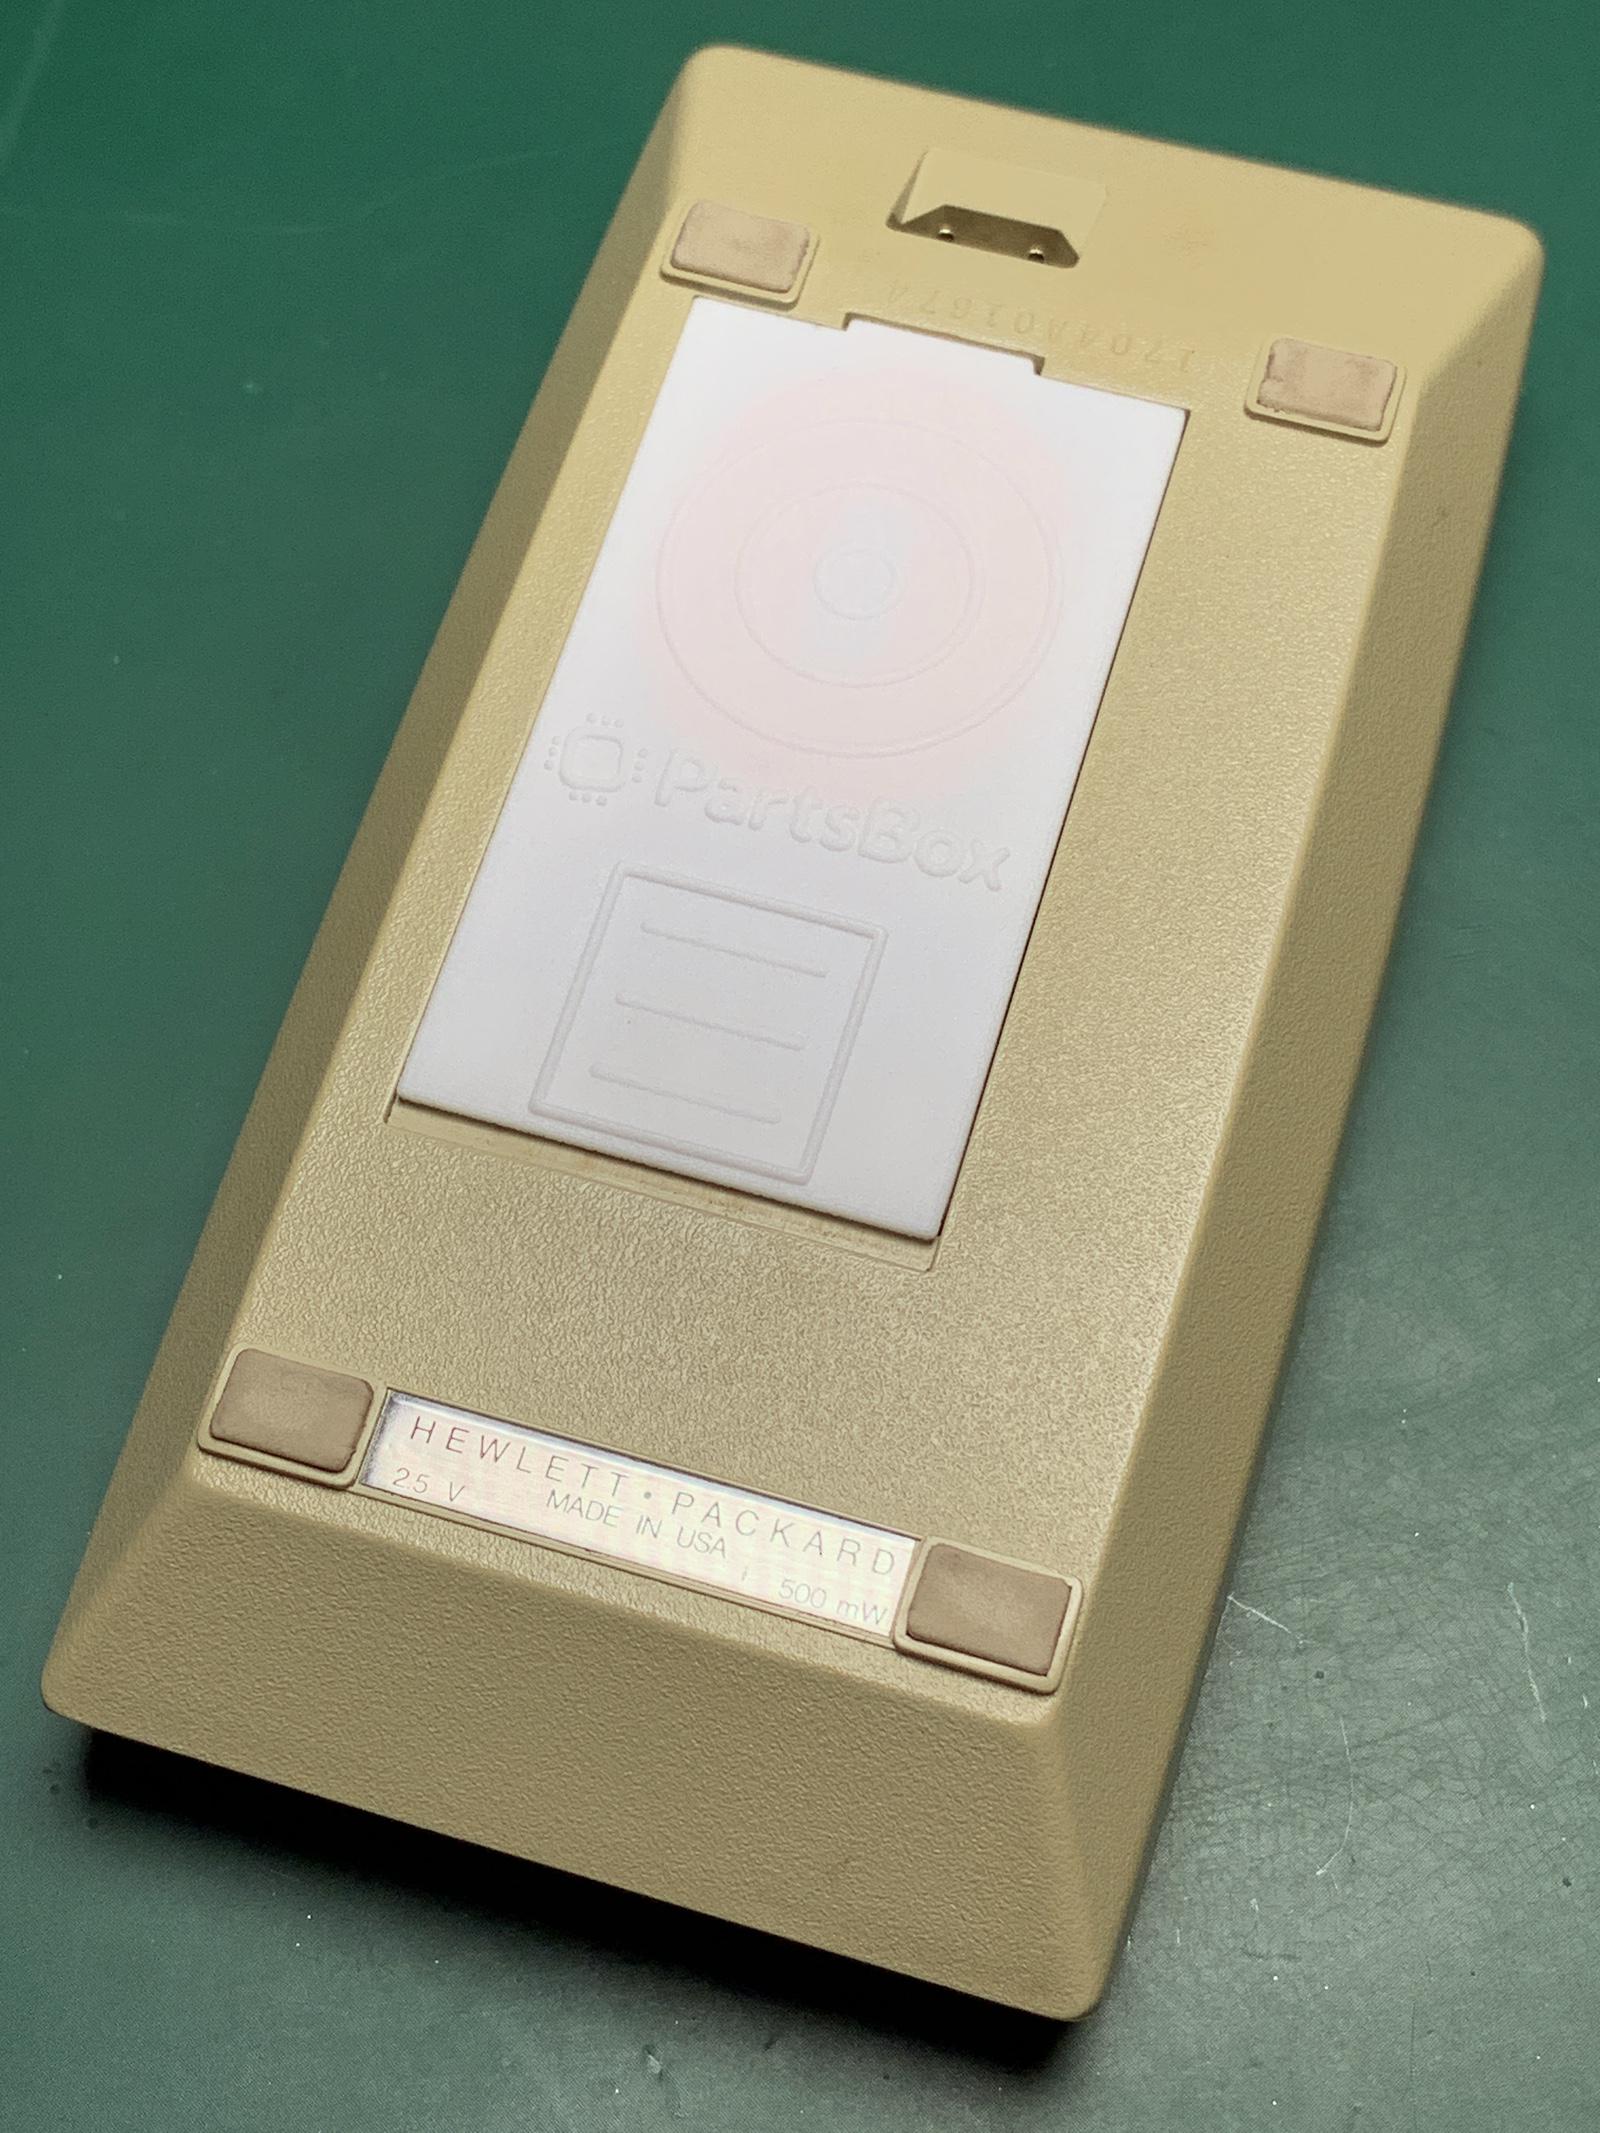
I designed the battery pack enclosure in Fusion 360, taking measurements of the original battery pack. That turned out not to be simple: the original pack was designed for injection molding, and draft angles complicated the geometry. Since I don't plan to mass-produce those, I didn't bother with designing for injection molding and assumed 3D printing using SLS (Selective Laser Sintering). This is why my battery pack opens differently from the original one, providing better access to electronics and battery, but sacrificing the ability to be injection-molded.
No fasteners were used: a simple spring clip is enough to hold the cover in place, and the pack is used in the calculator most of the time anyway, so there is no risk of the cover opening.
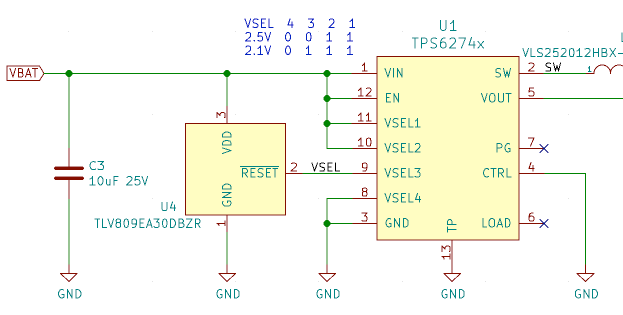
The calculator was normally powered by two NiCd cells, which have a voltage of 1.2V each. I decided to produce 2.5V instead of 2.4V, assuming that the additional 0.1V wouldn't hurt anything (after all, many people have been using their calculators with alkaline cells, which have a voltage of 1.25V), and the increased voltage would make the boost converter in the calculator slightly more efficient.
I decided to use one of the modern low-power buck controllers from Texas Instruments (TPS62740). Its low 360nA operating quiescent current meant that I wouldn't have to worry about having an on/off switch. There are controllers with lower quiescent current (even down to 60nA!), but I wanted to have programmable voltage output — read on to learn why.
For WPC/Qi, I went with bq51050B (Texas Instruments) and a coil from Wuerth Elektronik. This proved to be much more challenging than I thought: designing devices with wireless charging is difficult, requires multiple prototypes and measuring equipment that I do not have. In the end, I went with design decisions which might not be optimal, but in this case (with low power requirements) provide acceptable performance. In other words, I winged it. This was made somewhat more difficult by the fact that the bq51050B documentation is disappointing and not really up to TI's standards.
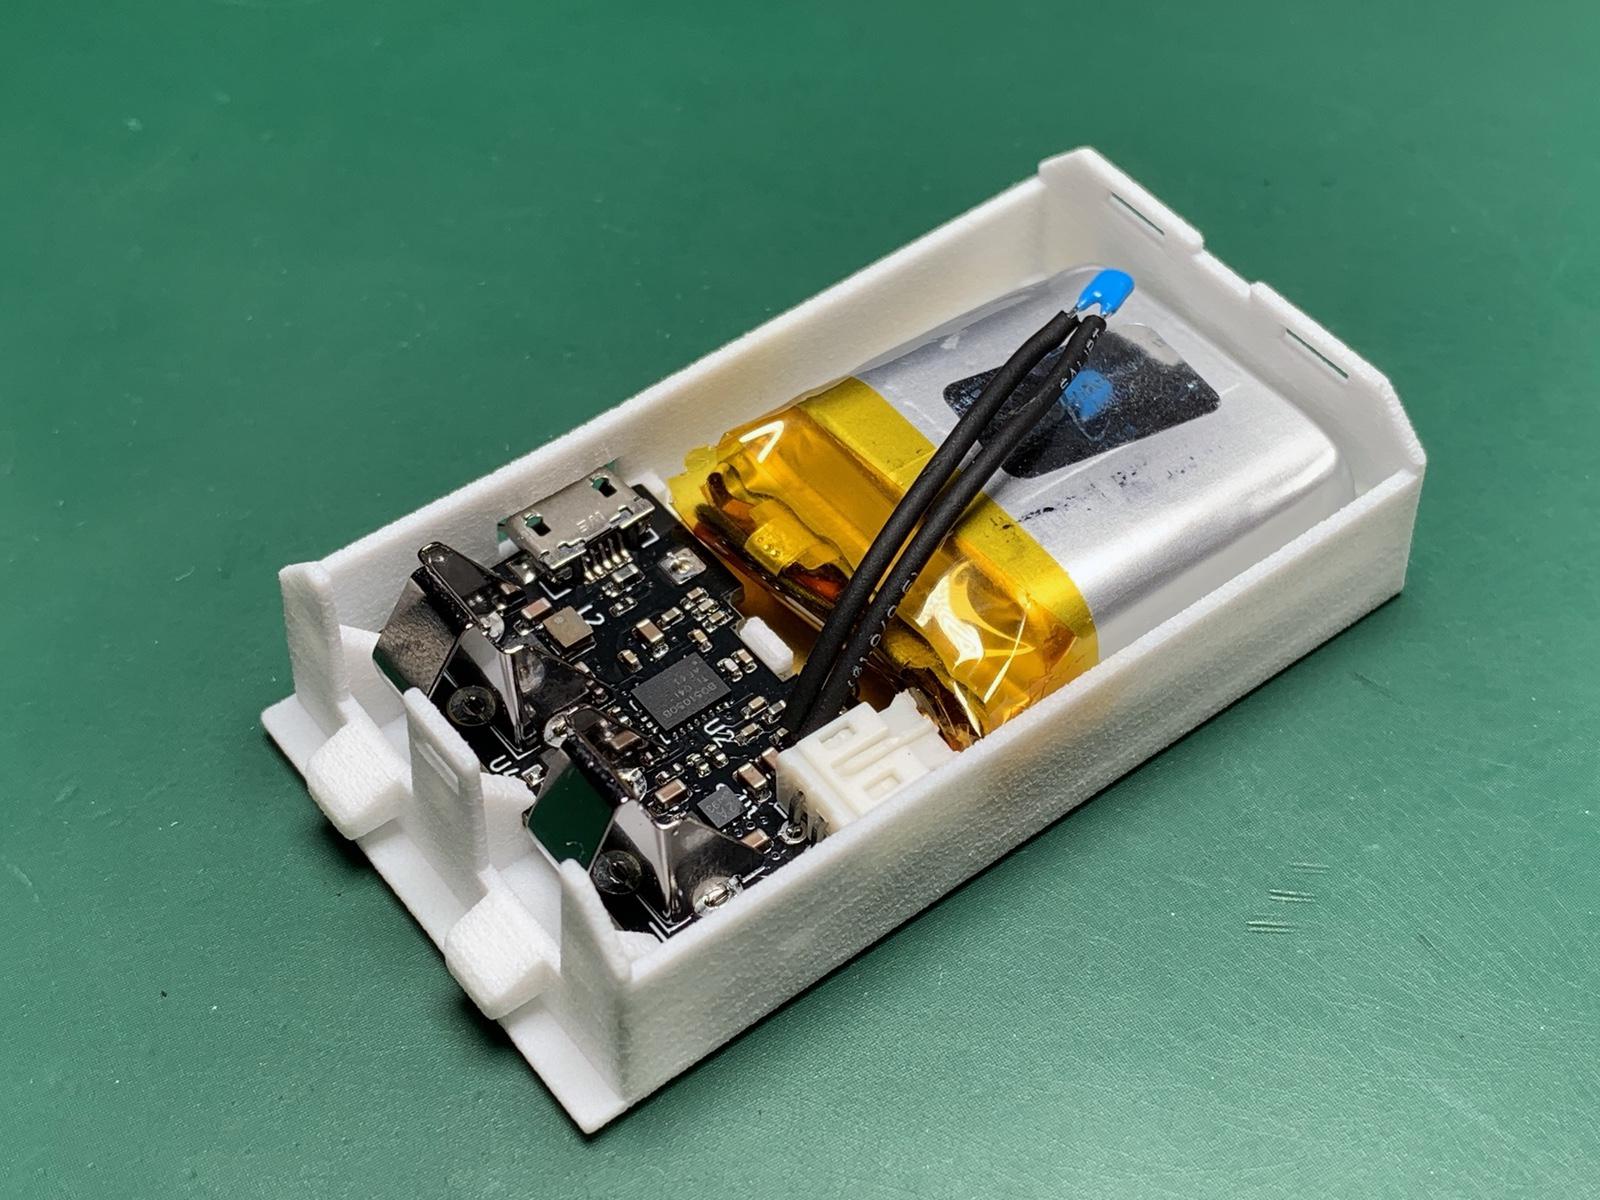
The board also has a Micro-USB port for wired charging, a charging controller IC (the popular MCP73832), a MOSFET pair acting as a switch for USB power, a bunch of ESD protection for exposed terminals, and a discrete thermistor to monitor battery temperature, since many cheap LiPos come without a thermistor or with one that doesn't match what the charging IC expects.
Designing a low-battery indicator was an interesting challenge. Assuming that voltage is a proxy for battery charge (which isn't entirely true for LiPo cells), how do you measure the voltage without drawing power constantly and discharging the battery in the process? Bear in mind that our power budget for this is in nano-amps: the quiescent power draw of the entire device should be below 1μA.
Since the coulomb-counting IC devices are way too expensive and usually come in unfriendly BGA packages, and also because I didn't want to over-complicate the design, I had to find something simpler.
A microcontroller-based solution could be designed, but for the first time in many years I wanted to design a device without a microcontroller and software.
Also, how do you display the result? You can't light up an LED, as that would quickly eat the remaining energy, possibly with no one even looking at the indicator. A "battery check" button? Possibly, but these complicate mechanical design significantly.
It took a while, but I did come up with a solution.
I realized that the calculator actually does have a built-in low-battery indicator. When battery voltage falls below a threshold (which I measured to be 2.1V), the LED screen lights up all the decimal dots, except the one that should normally be active. With decimal dots "inverted" this way, you can still use the calculator, but you clearly see that batteries need replacing.
So, I used a voltage (reset) supervisor with a 250nA supply current to monitor the battery voltage. If it falls below 3V, the output goes low. That output is connected to one of the voltage selector pins on the TPS62740 buck regulator (this is why I needed a programmable voltage output part) and causes it to start producing 2.1V instead of 2.5V. In other words, battery low, decimal dot LEDs light up, mission accomplished!
This turned out to work quite well in practice, and the 2.1V threshold worked for all the HP-25 units that I had. The only limitation is that with most LiPo batteries, their protection circuitry will cut the output off just below 3V, so you don't have much time after your dots light up.
My tests showed that the 900mAh LiPo is enough for about 10 hours of continuous use, before the low-battery indicator dots light up, and for 10-20 minutes afterwards. Good enough for me!
All in all, I'm very happy with the result of this weekend hacking project: my HP-25 calculators (yes, I have more than one) are useful again and I can use them every day without worrying about batteries. I just place them on charging pads from time to time. The battery life is so good, that doing this once a month or so is enough.
If you think about it, it's quite amazing that a 45-year old calculator got a new life thanks to 21st century technology!
Jan Rychter (PartsBox founder)
(If you enjoyed reading this and you work with electronics, please check out PartsBox — it's an indispensable tool for companies, and it's free for Hobbyists/Makers)
Earlier blog posts: Images for parts, locations and projects (2021-01-27)
Later blog posts: Immediate suspension of service to customers in Russia (2022-02-24)
PartsBox is an online app that lets you take control of your electronic parts inventory, BOM pricing, and small-scale production. It keeps track of where components are stored, what the current stock levels are, and which components are used in which projects/BOMs.
Blog Index
Quick tip: part spec overrides (2026-03-27)
What's new: early 2026 (2026-02-08)
2025: A Year in Retrospect (2026-01-14)
Use your parts library in KiCad (2025-05-12)
Improved BOM Management (2025-03-01)
Building Rockets: Aerospace Team Graz (2024-02-13)
Building Satellites with PartsBox: A Case Study (2023-12-01)
Images for parts, locations and projects (2021-01-27)
Heads-up: changes in builds ⚡️ (2021-01-12)
October 2020 update (2020-10-12)
What's new: May 2020 (2020-05-16)
KiCon 2019 (2019-03-27)
2018: A Year in Retrospect (2019-03-22)
2017: A Year in Retrospect (2018-01-09)
Barcode scanner support (2017-06-18)
Resources for hardware startups (2017-05-19)
How to organize electronic parts (2017-05-07)
BOM Pricing for projects is now available (2017-05-05)
Tags (2016-04-26)
Projects (BOM management) (2016-04-20)
An improved search engine (2016-02-27)